

Ever found yourself staring at your iPhone, wondering how to turn that high-resolution image into a sleek JPEG? You’re not alone! Many people encounter this digital dilemma, and let’s face it—sometimes, the struggle is real. Whether it’s for sharing on social media or saving space, mastering the art of image conversion can feel like a secret club where the password is lost in translation.
Understanding JPEG Format
JPEG, or Joint Photographic Experts Group, stands as a widely recognized image format. It provides a balanced approach to image quality and file size, making it ideal for many uses. Compression in JPEG reduces file size by discarding some data, which may affect quality, especially at higher compression levels.
Many digital cameras and smartphones default to using JPEG due to its compatibility across devices and platforms. This format supports 24-bit color, allowing for over 16 million colors, which offers vibrant images. Consequently, JPEG becomes the preferred choice for web use, email attachments, and social media.
With its lossy compression, JPEG optimizes storage space without requiring significant quality loss for most images. Those wanting to share photos online frequently benefit from this format’s smaller file sizes. Users appreciate how JPEG preserves fine details in well-lit images while maintaining manageable file sizes.
JPEG’s limitations include a reduction in quality with repetitive saving, which could lead to artifacts in the image. Additionally, it does not support transparency or layers, making alternative formats like PNG suitable for graphics requiring such features.
Maintaining the balance between quality and file size is crucial. Photographers often choose JPEG for everyday shots but may prefer RAW format for professional work. Understanding these nuances assists users in selecting the right image format according to their needs.
Converting images to JPEG on an iPhone allows users to maximize storage and compatibility. Adopting this format simplifies sharing while retaining quality for various applications.
Methods to Convert Images to JPEG on iPhone
Converting images to JPEG on an iPhone can enhance compatibility and conserve storage. Several methods exist to achieve this.
Using the Photos App
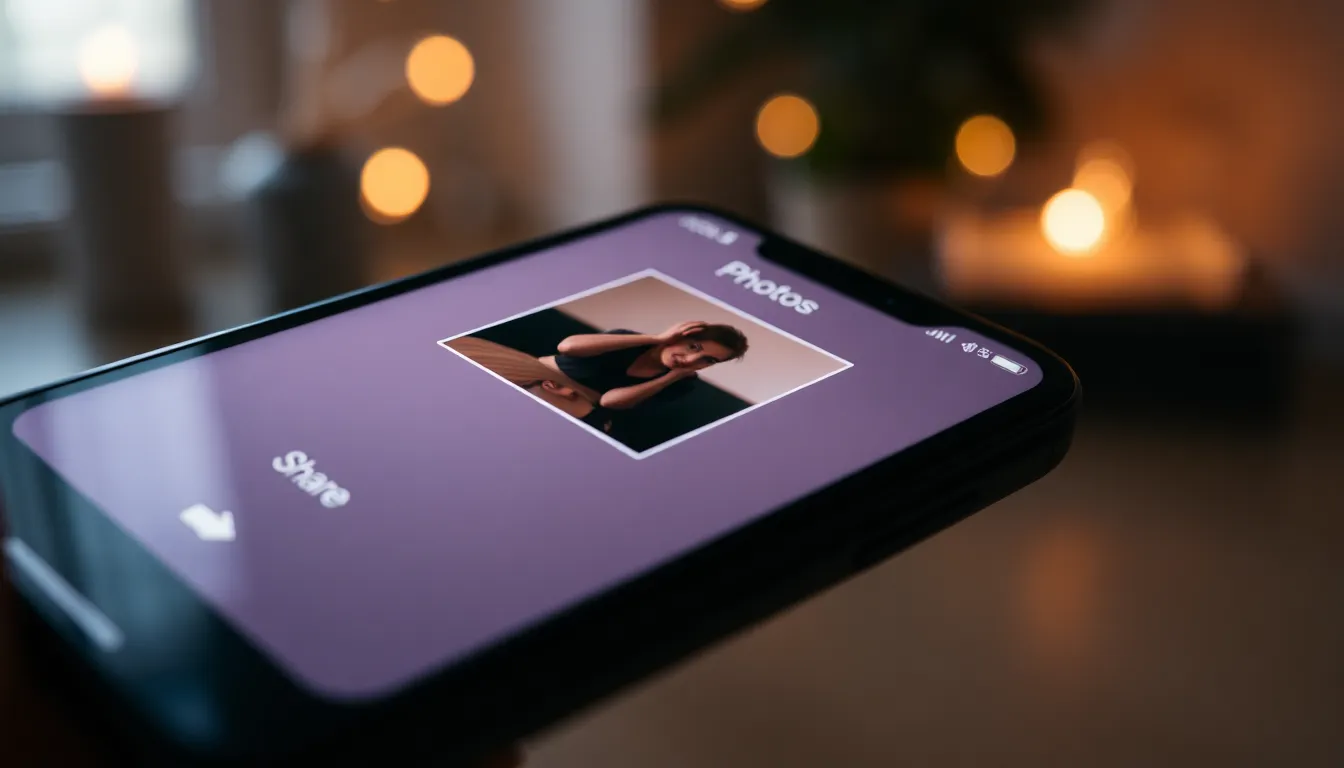
Using the Photos app provides a straightforward way to convert images. Users can select the image they want to change. Tapping the “Share” button reveals multiple options. Choosing “Save Image” saves a copy in JPEG format directly to the device’s Camera Roll. This method simplifies the process while ensuring a seamless transition to the desired format.
Using Third-Party Apps
Third-party apps offer additional features for image conversion. Numerous options are available on the App Store, such as Image Converter or JPEG Converter. After installing an app, users can upload their images for conversion. Most apps provide custom settings, allowing adjustments to quality and size before saving. This flexibility ensures users meet specific needs for sharing or storage without sacrificing quality.
Step-by-Step Guide
This section offers detailed methods for converting images to JPEG format on an iPhone.
Converting with the Photos App
Converting images with the Photos app is straightforward. First, locate the image in the Photos app. Once found, tap the “Share” button in the bottom left corner. Next, select “Save Image” to create a JPEG copy, which automatically saves to the Camera Roll. JPEG format maintains a balance between quality and file size. This method is efficient, especially for quick conversions without additional tools.
Converting with Third-Party Apps
For users seeking more features, third-party apps provide robust options. Numerous apps are available that specialize in image conversion. After installing an app such as Image Converter or JPEG-PNG Image File Converter, users can select an image from their library. The app interface typically includes settings to adjust quality and size before converting. Saving the final output as JPEG allows for tailored results, ensuring a balance between quality and file size while enhancing compatibility for sharing or storage.
Tips for Best Quality Conversion
Choosing the right conversion method impacts image quality. Use the built-in Photos app for simple and quick conversions. The app retains image metadata during the conversion process, ensuring details remain intact.
Select high-resolution images for better output. Higher resolutions generally provide clearer JPEG images. Aim for well-lit photographs since JPEG handles bright details effectively.
Adjust quality settings when using third-party apps. Many applications allow users to set compression levels, balancing file size against image fidelity. Lower compression preserves quality but increases file size, while higher compression reduces both.
Be aware of the limitations of repetitive saving. Constantly saving a JPEG can lead to quality degradation. To maintain clarity, work with the original image whenever possible.
Consider exporting from editing apps to improve the final result. Editing tools often provide options to save directly in JPEG format with optimal settings. Enhanced adjustments in these apps contribute to sharper images.
Lastly, utilize cloud storage for ease of access and backups. Storing JPEG images in the cloud allows for hassle-free organization. Cloud services also ensure images remain safe during conversions, safeguarding against potential data loss.
Mastering the conversion of images to JPEG on an iPhone opens up a world of convenience for users. This format not only optimizes storage but also enhances compatibility across various platforms. By utilizing the built-in Photos app or third-party applications, users can easily convert images while maintaining quality.
Understanding the nuances of JPEG compression helps in making informed decisions about image quality and size. With the right techniques and tools, anyone can efficiently manage their photo library and share vibrant images without hassle. Embracing these methods ensures that users can enjoy their photos while keeping their devices organized and ready for any occasion.


